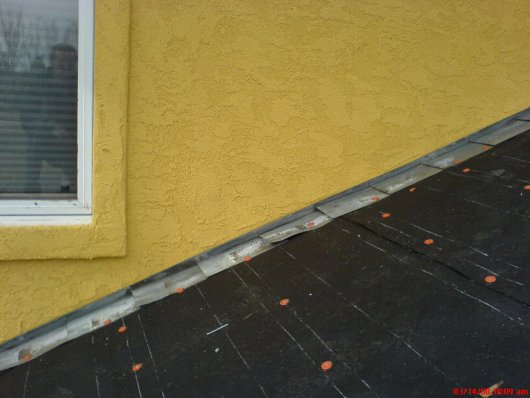
Step Flashing Roof Wall Connection

Nz4f Khkb0fuzm

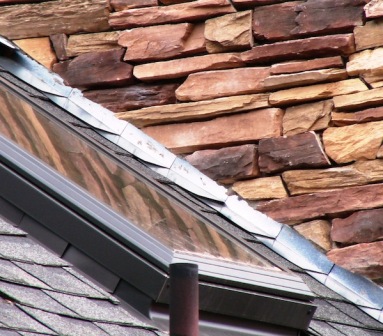
Rooftowall Step Flashing Homefax Inspections Llc

How To Install Step Flashing Where Roof Adjoins Siding Roofing Repair

Retrofitting Step Flashing Concord Carpenter

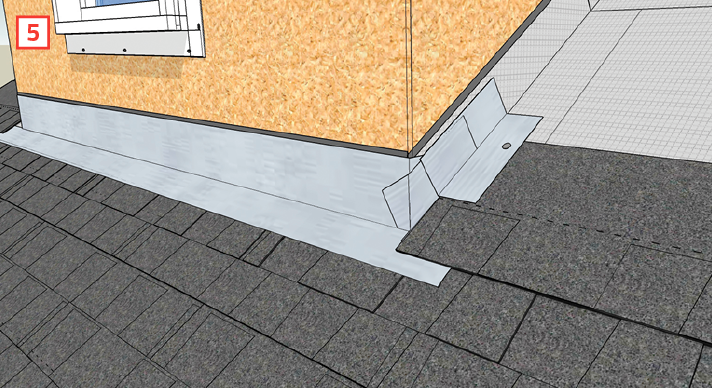
Reverse Lapped Step Flashing Builder Magazine
Roof To Wall Intersections
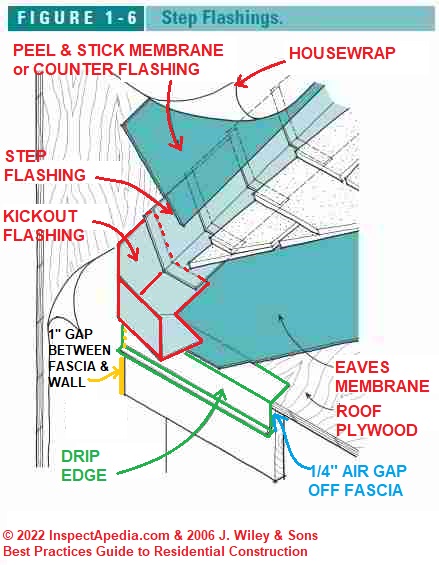
Step flashing step flashing redirects the water back onto the shingle.
Step flashing roof wall connection.
Mastering Roof Inspections Flashing Part 2 Internachi
Wall Flashing Roof Wall Flashing Errors And Causes Of Leaks

Wall Flashing Techniques For Leakproof Walls
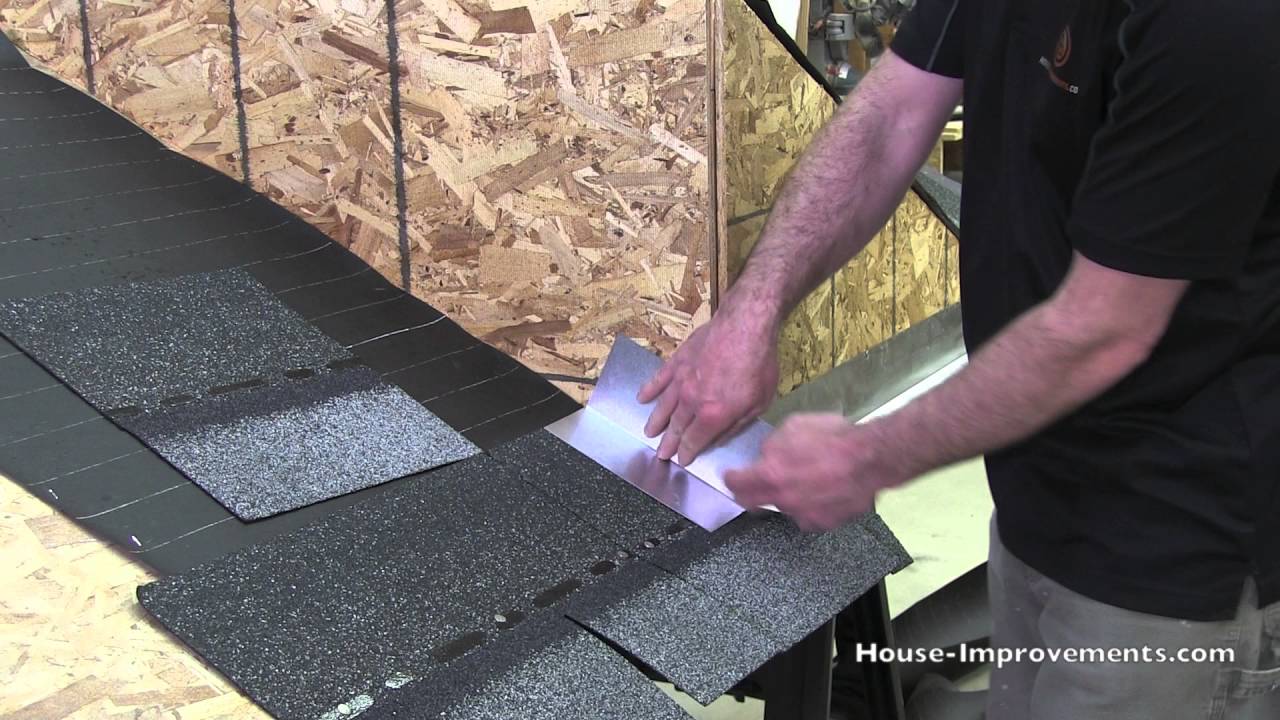
How To Shingle Step Flashing Youtube

Tile Sidewall Flashing Flashing Installation Matterhorn Metal Roofing Youtube
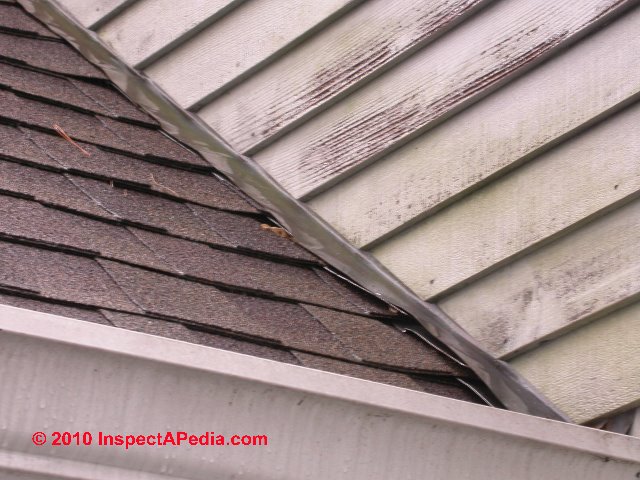
Roof Wall Flashing Errors And Causes Of Leaks

Step Flashing To A Brick Wall Youtube

Building Flashing Types Installation Inspection Repairs Home

Heavy Membranes At Valley And Roof Deck Penetrations Building America Solution Center Roof Repair Diy Roofing Roof Repair

The Importance Of Roof Flashing Infinite Roofing Blog
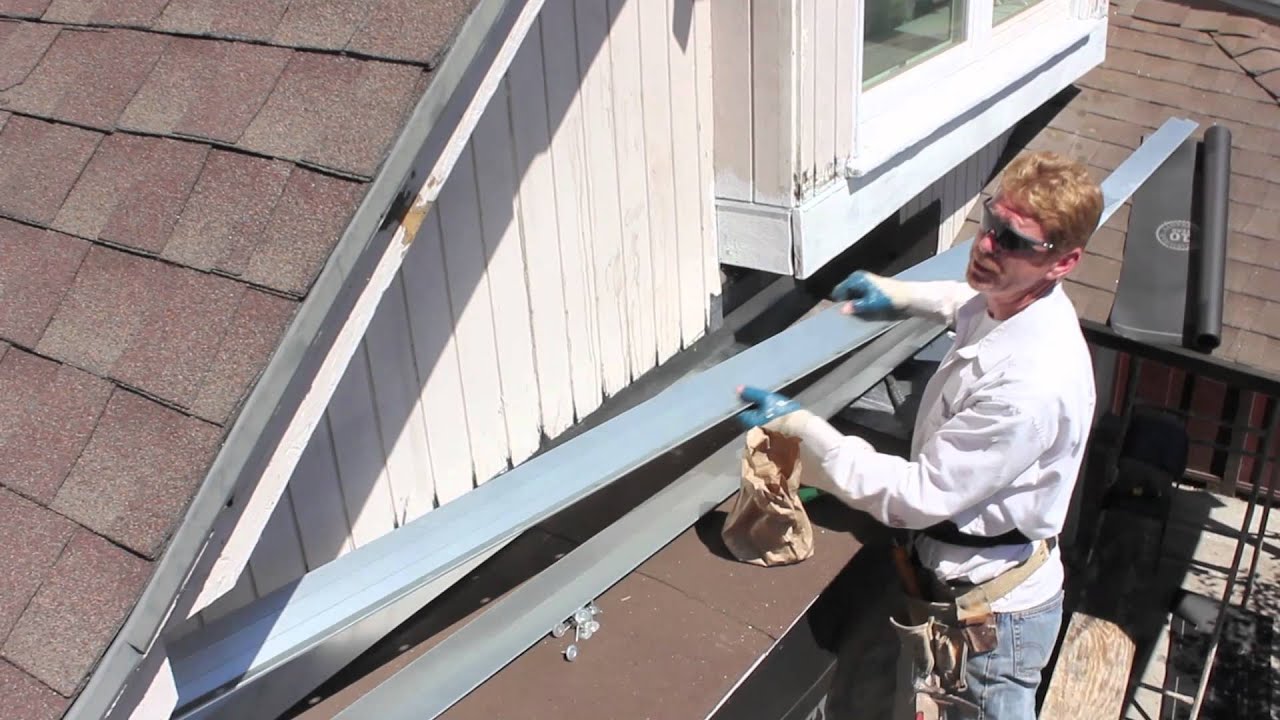
How To Flash A Dormer Pro Remodeler

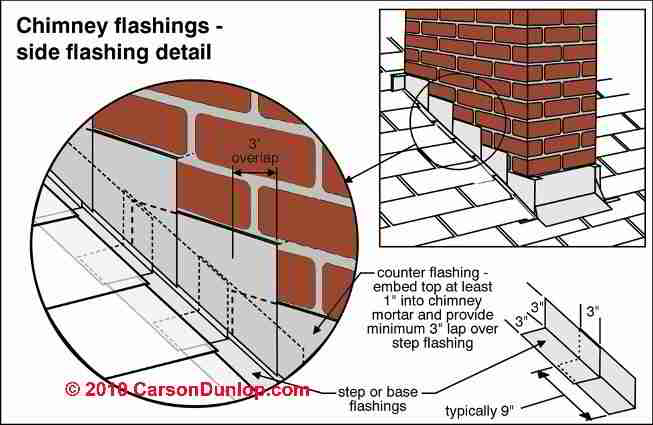
Common Flashing Details Building Science Consulting

Pin On Destinasi

Tips For Installing Leakproof Kickout Flashing Pro Remodeler

Pin On Diy And Crafts
Installing Roof To Wall Flashing Youtube
Flashing Shed Dormers Jlc Online

Pin On Skylite
Https Encrypted Tbn0 Gstatic Com Images Q Tbn 3aand9gcqfwuteol9cqcfhrvz4ubixixg8klwbqrunasts9ammzo2vd5m6 Usqp Cau

Cedar Shingles At A Wall Roof Intersection Jlc Online

Pin On Roofing
Roof Maintenance Winter Cold Weather Roof Problems Other Roof Replacement Maintenance Foul Ups
Suntuf 4 Ft Clear Polycarbonate Wall Connector Flashing 108657 The Home Depot
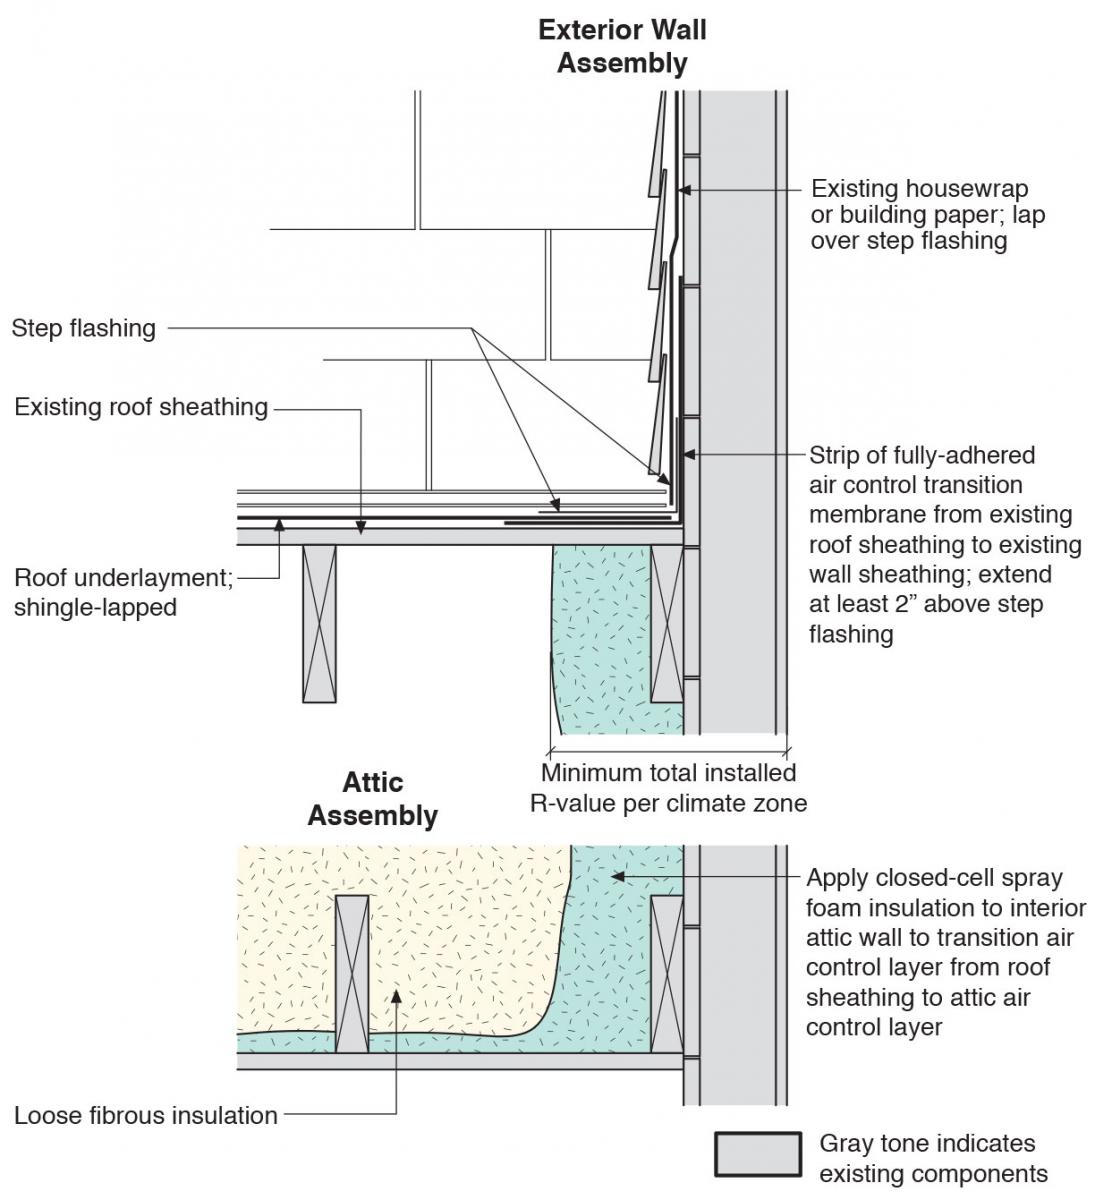
Flashing Of Roof Wall Intersections In Existing Homes Building America Solution Center
Source : pinterest.com
